作者:老葛,北京亚艾元软件有限责任公司,http://www.yaiyuan.com
我们最后,看注册页面,这也是一个表单,更复杂一点,我们这里给出代码,和具体的实现。我们的目标样式:

1) 我们需要为用户添加一个手机字段,并将它显示在注册表单页面。导航到admin/config/people/accounts/fields,添加手机字段,字段配置。
|
属性 |
值 |
|
标签 |
手机 |
|
机读名称 |
field_telephone |
|
字段类型 |
文本 |
|
控件 |
文本字段 |
|
必填字段 |
选中 |
|
在用户注册表单中显示 |
选中 |
|
值的数量 |
1 |
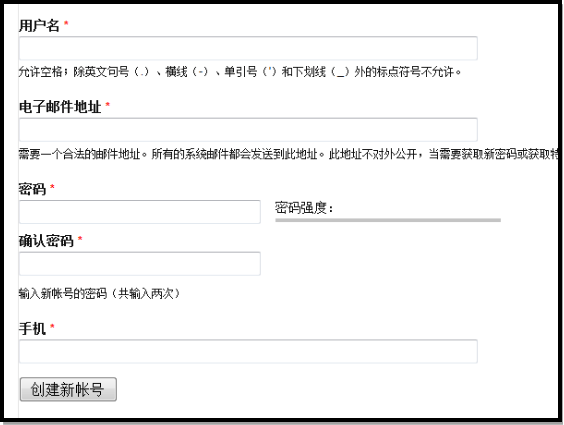
其它采用默认配置即可。现在的注册表单,是这个样子的:

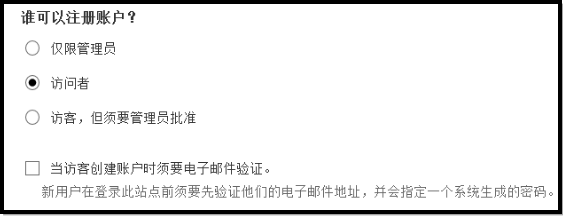
为了让用户能够在注册的时候,设置自己的密码,我们需要在admin/config/people/accounts页面,账号设置页面,配置一下,这里是我的配置:

现在注册页面,用户可以设置自己的密码了:

2) 我们开始写代码了,这里给出来的是我调试好的代码。在template.php的snt_theme函数里面,添加以下代码:
$hooks['user_register_form'] = array(
'template' => 'user-register-form',
'render element' => 'form',
'path' => drupal_get_path('theme','snt').'/templates',
//'preprocess functions' => array('snt_preprocess_user_register_form'),
);
添加预处理函数snt_preprocess_user_register_form:
function snt_preprocess_user_register_form(&$variables) {
//print debug($variables['form']);
$variables['form']['account']['pass']['pass1']['#theme_wrappers'] = array();
$variables['form']['account']['pass']['pass2']['#theme_wrappers'] = array();
$variables['form']['account']['pass']['pass1']['#attributes'] = array('class' => array('wbk'));
$variables['form']['account']['pass']['pass2']['#attributes'] = array('class' => array('wbk'));
}
添加函数snt_form_user_register_form_alter:
function snt_form_user_register_form_alter(&$form, &$form_state) {
//drupal_set_message('123456');
//print debug($form['account']['pass']['pass1']);
$form['account']['name']['#theme_wrappers'] = array();
$form['account']['mail']['#theme_wrappers'] = array();
$form['account']['pass']['#theme_wrappers'] = array();
//$form['account']['pass']['pass1']['#theme_wrappers'] = array();
//$form['account']['pass']['pass2']['#theme_wrappers'] = array();
$form['field_telephone']['und'][0]['value']['#theme_wrappers'] = array();
$form['account']['name']['#attributes'] = array('class' => array('wbk'));
$form['account']['mail']['#attributes'] = array('class' => array('wbk'));
//$form['account']['pass']['pass1']['#attributes'] = array('class' => array('wbk'));
$form['field_telephone']['und'][0]['value']['#attributes'] = array('class' => array('wbk'));
$form['actions']['submit']['#attributes'] = array('class' => array('anniu'));
$form['actions']['submit']['#value'] = t('');
// print debug($form['account']['pass']);
}
最后创建user-register-form.tpl.php文件,里面的代码如下:
<div class="zhuce">
<table width="489" border="0" align="center">
<tr>
<td class="yhzc" colspan="3">用户注册</td>
</tr>
<tr>
<td class="mima"><span>*</span>用户名:</td>
<td><label><?php print render($form['account']['name']); ?></label></td>
<td class="hb">账号不能为空</td>
</tr>
<tr>
<td class="mima"><span>*</span>密码:</td>
<td><label><?php print render($form['account']['pass']['pass1']); ?></label></td>
<td class="hb">密码不能为空</td>
</tr>
<tr>
<td class="mima"><span>*</span>确认密码:</td>
<td><label><?php print render($form['account']['pass']['pass2']); ?></label></td>
<td class="hb">确认密码不能为空</td>
</tr>
<tr>
<td class="mima"><span>*</span>手机:</td>
<td><label><?php print render($form['field_telephone']['und'][0]['value']); ?></label></td>
<td class="hb">手机号码不能为空</td>
</tr>
<tr>
<td class="mima"><span>*</span>电子邮件:</td>
<td><label><?php print render($form['account']['mail']); ?></label></td>
<td class="hb">电子邮箱地址不能为空</td>
</tr>
<tr>
<td class="xib" colspan="3"><label><?php print drupal_render($form['actions']); ?></label></td>
</tr>
</table>
<?php drupal_render_children($form)?>
</div>
这里面的代码,实现方式,与前面我们介绍的有所不同,我们没有在预处理函数里面定义变量,而是直接在模板里面输出对应的表单元素,注意这句代码的应用:
<?php print render($form['account']['name']); ?>
还有,就是密码确认表单元素,实际上由两部分组成pass1和pass2,不过在form_alter里面,我们获取不到,所以把对它们的修改放在了预处理函数里面了。
再有就是字段field_telephone的用法,需要特别的注意,对应的数组结构。
最终样式,完全和目标一致:

如何去掉这里的标题和标签呢?前面已经有个例子了,这里就不多说了。


